

 en
en
 English
 Español
You turn the key, or press the valve start button, and nothing happens. The component that usually gets blamed is the solenoid—a small coil-and-plunger switch that fails more often than the equipment it controls. You do not need a multimeter to confirm the diagnosis. With a 12 V battery, a couple of jumper wires, and a set of systematic checks, you can tell whether the coil is open, the plunger is stuck, or the real fault is hiding in the wiring.
The six checks below move from the quickest to the most involved. Each one produces a clear pass-or-fail signal, and the result table at the end maps every symptom to a likely cause and a next step.
Content
What You Are Actually Testing
A solenoid is a coil of copper wire wrapped around a hollow bobbin, with an iron plunger held partway out by a return spring. When current flows through the coil, the magnetic field pulls the plunger in; when current stops, the spring pushes it back out. That linear motion opens a valve, closes a contactor, or throws a starter pinion into gear.
Three failure modes account for almost all solenoid faults. An open or shorted coil produces no magnetic field. A seized plunger, usually from dirt or corrosion, leaves the coil healthy but the motion missing. A broken or weak return spring produces motion with no reliable reset. The checks below are designed to separate these three cases using nothing but power, a few wires, and your senses.
Six Checks That Need No Multimeter
These checks use the parts most workshops already have. Gather them before you start:
- A source of power at the solenoid's rated voltage, such as a 12 V battery
- Two short jumper wires with insulated clips
- A 12 V test light, or a car bulb with two pigtail wires
- An insulated screwdriver and an extra steel screwdriver for the magnetic test
1. The Click Test
Operate the solenoid from its normal switch and listen. A healthy unit makes one firm click as the plunger seats against the stop; repeat the operation two or three times to confirm it is consistent. Silence means either the coil is not building a field or the plunger is locked solid. A faint buzz instead of a click usually points to low supply voltage or a coil with damaged turns, while rapid chattering indicates a weak ground or a failing control relay.
2. The Magnetic Screwdriver Test
This test leaves the solenoid installed. Apply power from the normal circuit and hold a steel screwdriver tip close to the coil housing. If the coil is producing a magnetic field, the tip is pulled with a clear tug. No tug means the coil is dead or not receiving power. On an AC-powered coil you should feel a vibration at line frequency instead of a steady pull—that is also a live-field signature. The test confirms the coil, not the plunger, so treat it as one step in a full diagnosis.
3. The Test-Light Circuit Check
A test light behaves like a practical voltmeter. Clip its ground lead to a clean metal point, probe the hot wire at the solenoid with the switch closed, and the lamp should glow at full brightness. A bright lamp means power is arriving and the fault is inside the solenoid; a dim or dark lamp means the fault is upstream, in the switch, relay, fuse, or ground path. With one probe you have divided the circuit into two halves and eliminated the supply side without measuring a single volt.
4. The Direct Battery Test
Remove the solenoid and connect the coil terminals directly to a power source at the rated voltage—commonly 12 V or 24 V DC, and 110 V or 230 V AC on industrial units. For DC, two jumper wires and a battery are enough. For AC, use a fused cord and keep your fingers away from the terminals. Make the connection for one or two seconds only. A good coil snaps the plunger in and holds it until the connection is broken. No response means an open coil. A dull, grumbling pull means the winding is damaged or the plunger is dirty. A stalled coil draws locked-rotor current and overheats in minutes, so never energize it longer than the test requires.
5. The Jumper-Wire Bypass for Starter Solenoids
On automotive and marine starting circuits, bridge the large battery terminal to the S (start) terminal with a heavy jumper or an insulated screwdriver for one second. If the starter spins, the solenoid is good and the fault is in the ignition switch or its wiring. If the starter stays silent with battery voltage applied directly, the main contacts are burned or the coil is open. Expect sparks; keep the jumper clear of fuel lines, and never use this method on circuits above 12 V.
6. The Known-Good Swap
When a spare of the same part number is available, swapping it in gives the most conclusive result of all. The system works: the original unit was faulty. The system still fails: the fault lives elsewhere. Field technicians without a meter rely on this method constantly, and on machines with exchange spares it costs nothing but five minutes of labour.
Start with the click test because it takes ten seconds and needs nothing but your ears. If the result is ambiguous, the magnetic and test-light checks let you keep the solenoid installed while you work. Move to the battery and bypass tests when you need to prove whether the coil, the contacts, or the supply is at fault.
Reading the Results
Every symptom maps to a small set of causes. Use the table below as a quick triage reference, then act on the recommended step.
| Symptom | Most likely cause | Next step |
|---|---|---|
| No click, no motion | Open coil or missing supply | Test-light circuit check; replace solenoid if power is present |
| Click but no stroke | Seized plunger or low voltage | Clean plunger bore; verify supply and ground |
| Chatter or buzz | Weak hold-in, poor ground, shorted turns | Clean terminals and ground; replace coil if buzz persists |
| Click, but no crank or flow | Burned main contacts or blocked valve body | Jumper bypass to confirm contacts; clean valve internals |
| Runs hot after seconds | Overvoltage or shorted turns | Verify rated voltage; replace the coil |
Three conclusions cover almost every outcome. A firm click followed by normal operation means the solenoid is healthy. A click with weak or absent output means a mechanical fault or a contact problem. Complete silence when power is present means an open coil or a jammed plunger. Remember that a click proves the coil and plunger move; it does not prove the main contacts are passing current, which is why the bypass test and the battery test look at the load side as well.
After any repair, run the test once more and confirm that the valve or actuator reached the commanded position. In remote or automated installations, a limit switch wired back to the control panel gives a positive open-or-closed signal, so you are not guessing from a distance.
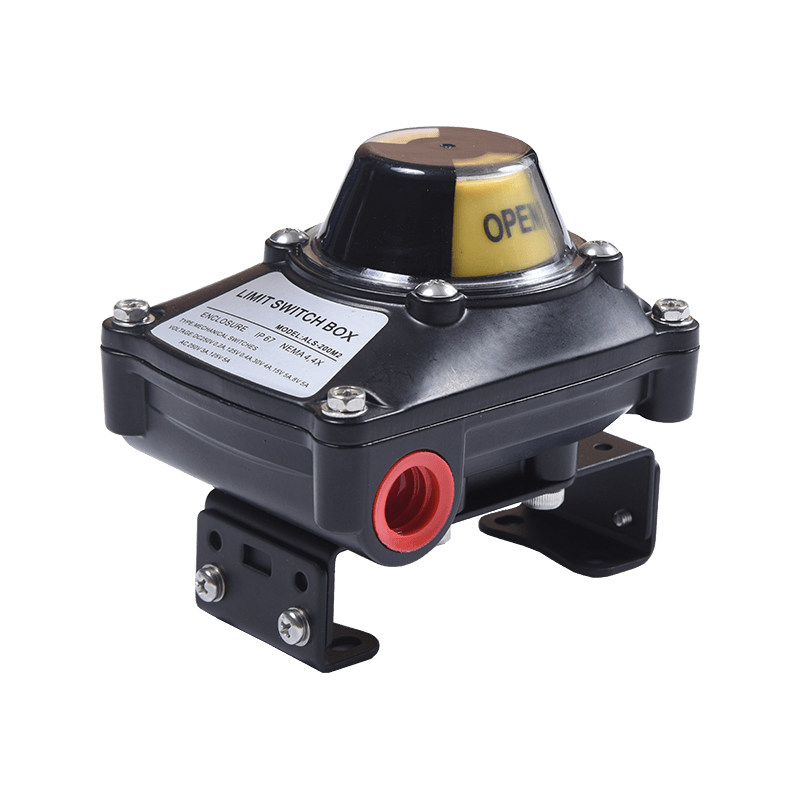 ALS Series Limit Switch with IP67 and Hazardous Area CertificationThis compact limit switch provides clear open-or-closed feedback in automated valve packages, with IP67 weatherproofing and hazardous area approvals. Its multi-view indicator and dual cable entries make it suitable for verifying valve position from a distance after repairs.View Product →
Testing a Solenoid Valve Without a Multimeter
Solenoid valves differ in one useful way: the operator drives a small pilot or a direct-acting valve body, so you can verify both halves separately. Energize the coil at its rated voltage and watch for two things: an audible click and actual flow through the valve. A click with flow means the complete assembly is good. A click without flow means the plunger tube or the orifice is blocked by debris, so lift the operator off the body and clean the flow path. Silence means the coil is dead or the lead wires are broken at the connection, so inspect the flying leads and terminals first.
In automated quarter-turn valve packages, a solenoid is often the pilot that switches compressed air to a pneumatic actuator. If the pilot is healthy but the valve still moves slowly or not at all, the problem is usually pneumatic: low supply pressure or an actuator torque that does not match the valve. Our pneumatic actuator sizing guide explains how to calculate the required torque before you blame any component.
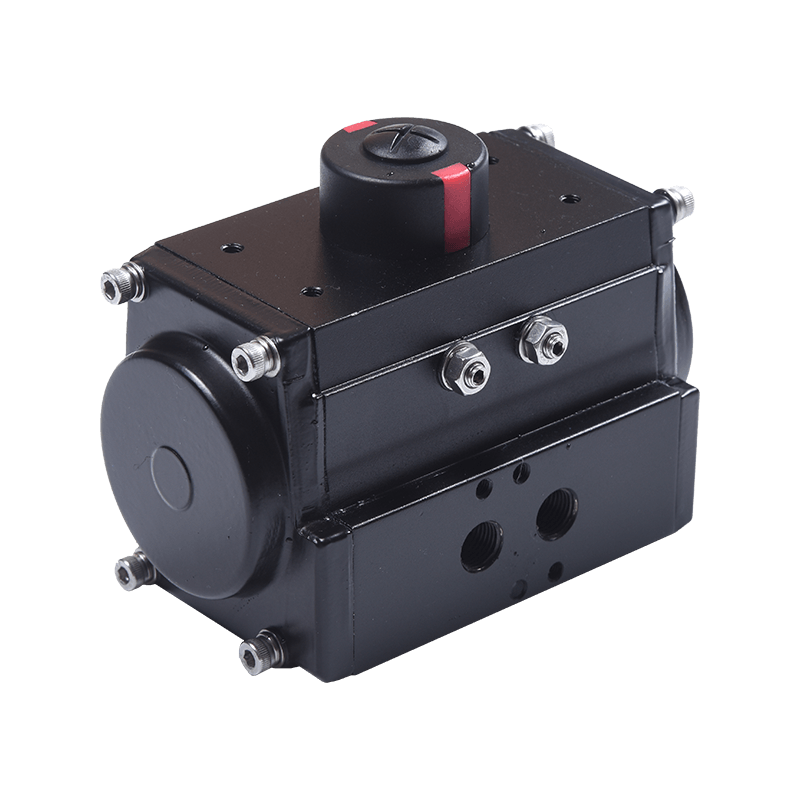 10 Series Rack and Pinion Pneumatic ActuatorWhen a solenoid pilot is healthy but valve motion is slow, this dual-piston actuator offers high cycle life and fast quarter-turn operation. Its modular spring cartridge and interchangeable mounting help confirm whether torque mismatch or low pressure is the real issue.View Product →
When the pilot is confirmed good but the actuator still fails, check for a seized valve stem. A manual override gives a quick mechanical answer: turning the handwheel on a part-turn gearbox operates the valve by hand and shows whether the valve itself is free or jammed.
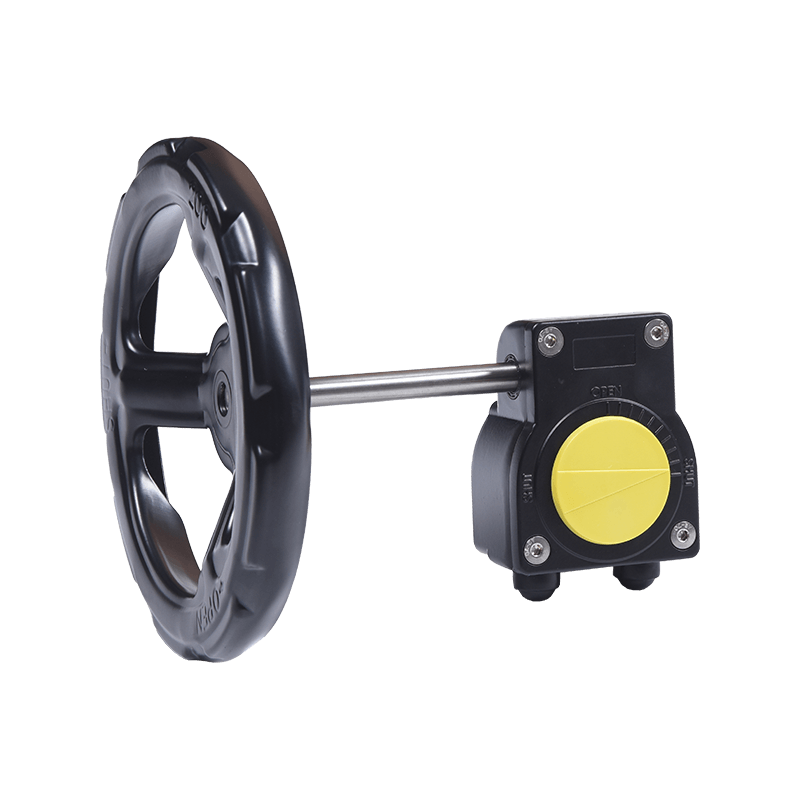 20-Series Manual Aluminum Part-Turn GearboxThis handwheel gearbox provides a manual override to test valve stem freedom when an actuator fails. With ISO5211 mounting and up to 5500 Nm output torque, it helps isolate whether the valve is seized or the pilot is faulty.View Product →
Repair or Replace
A coil is the only part worth replacing on its own, and only when the housing, plunger, and terminal plate are still clean and true. If the plunger bore is scored, the coil has been overheated more than once, or the terminals are corroded, replace the complete solenoid. Fitting a new coil to a worn plunger is the quickest way to pay twice.
The same thinking applies to the rest of a valve automation package. In our experience, field reliability comes from components with controlled materials and machining, which is why our vertically integrated manufacturing partner controls every stage from raw alloy to finished assembly. When you choose spares, the supplier's process matters as much as the part number.
If the actuator, gearbox, or position feedback components show the same kind of wear, apply the same rule: test first, repair small items, and replace anything that has been overheated, corroded, or damaged beyond spec.